Say you need to print a batch of Certificates for the participants of your training class. Are you going to print the Certificates one by one with the individual names or let Word’s Mail Merge function do that for you automatically?
After you have customised your selected Certificate template, get your list of participants’ names. I suggest you create the name list in Excel and call it, say, “Participants”. Let’s say the names are in column A. Label cell A1 as “Name”. The names are in cells A2 to A20, say.
Open your Certificate template in Word and leave your cursor on the spot where the names will be printed. Go to Mailings and click on Insert Merge Field, select the label “Name” from the name list “Participants”. Next at Mailings -> Start Mail Merge -> Step-by-Step Mail Merge Wizard. Follow the steps. When asked to Select Recipients, use an existing list and browse your PC for the name list “Participants” that you created earlier. Finally, complete the merge and Print. The Certificates will be printed one-by-one with the names from the name list.
Support for Windows XP ended on April 8, 2014 while support for Windows Vista ended on April 11, 2017. So unless you wish to pay about RM130.00 for a new Windows 10 licence, your Notebook/PC is practically useless because many new programs will not run on XP/Vista and moreover your device is now a security risk.
That was the situation facing me with my wife’s HP Mini (Intel ATOM) notebook. It had Windows XP and was incredibly s-l-o-w. I was prepared to junk it when I decided to ask Uncle Google what can I do with it. Oh joy! I found this article https://www.computerworld.com/article/3033439/windows-xp-upgrade.html and it works! I will summarise it below:
The answer is in a service called CloudReady that converts old computers into cloud-centric Chromebook-like systems. It’s provided free of charge to individual users by a company called Neverware. The CloudReady OS is based on Google’s Chromium OS, the same open-source architecture as Chromebooks and Chrome OS. Neverware has different pricing plans for Enterprises and Education Instituitions, but it available FREE for personal home use (with some limitations).
If you want to convert your old notebook/PC to a CloudReady Chromebook-like device that runs Google apps instead of Windows programs, here are the steps.
Make sure the target device is turned off. Plug in the USB Installer to boot from the USB stick. For my HP Mini, as I turned on the power, I clicked F9 repeatedly until I see the boot-up options on the screen. Select the boot from USB option. You should see a white splash screen with the CloudReady logo.
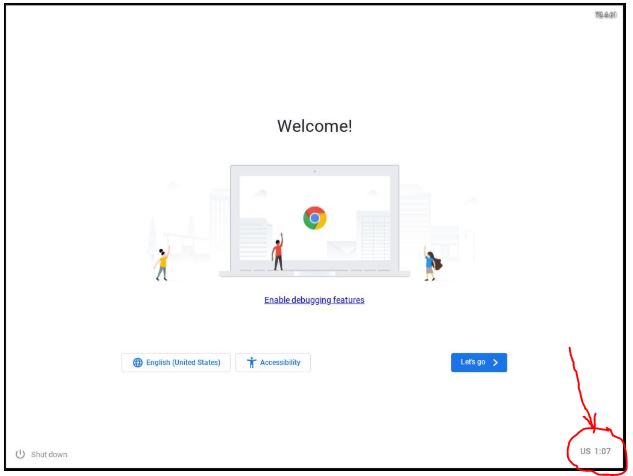
8. After the white splash screen with the CloudReady logo, you will see the Welcome Screen. Look for the digital clock on the lower right hand corner and click on it.
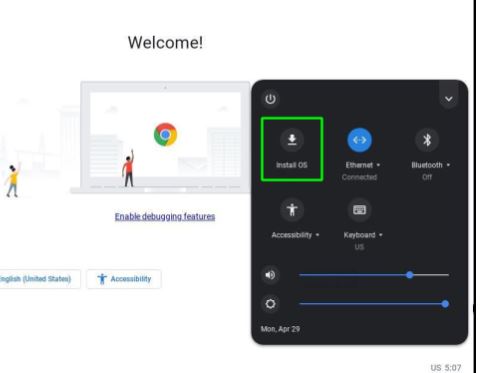
9. Be sure you have backed up your data. As the installation proceeds, the hard disk will be reformatted. Click the clock and then the Install OS option.
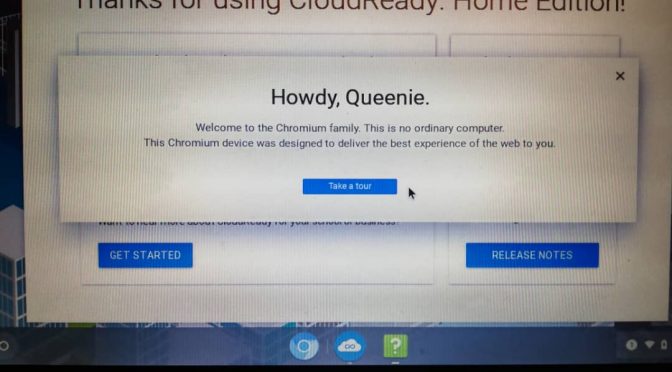
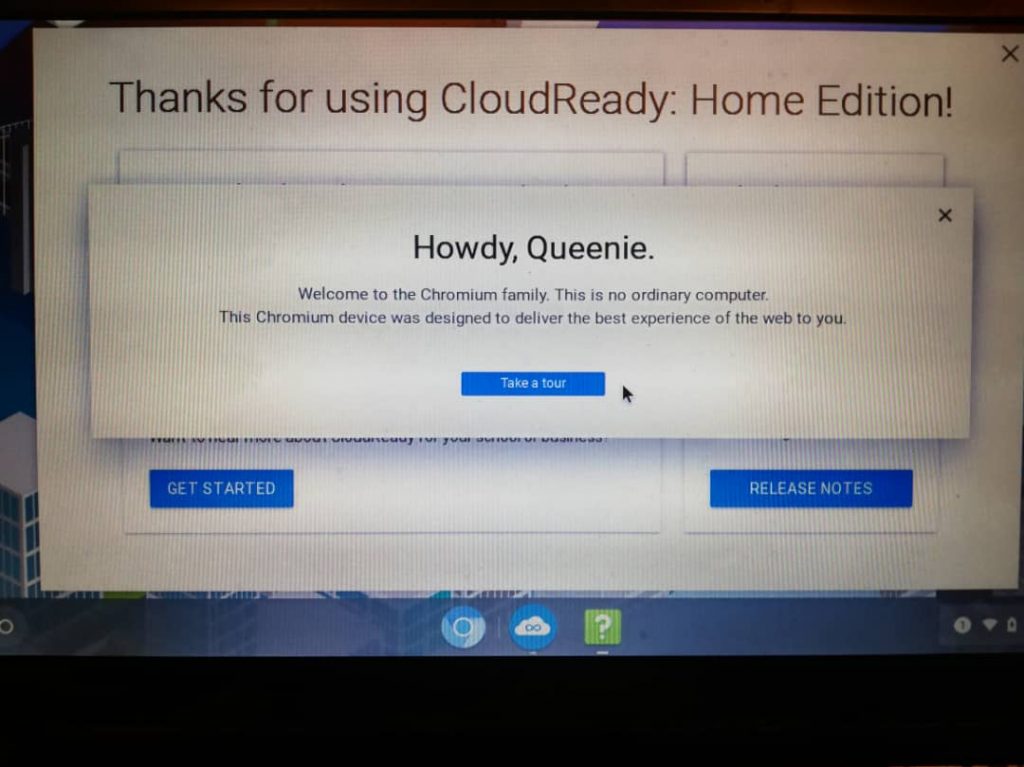
10. After the successful installation, you get a Welcome screen. Click on the Let’s Go…. Connect to your Network, Data Consent, and finally Sign-in with your Google account. That’s it…..
That’s it…your Windows XP computer is now an Android-like, Chromebook-like device. Use it for your Gmail and run Google apps. Enjoy!
When you have taken enough of portraits, you are bound to get a request to darken someone’s grey hair or to remove someone’s wrinkles. Here are two quick ways to do both of that Photoshop magic.
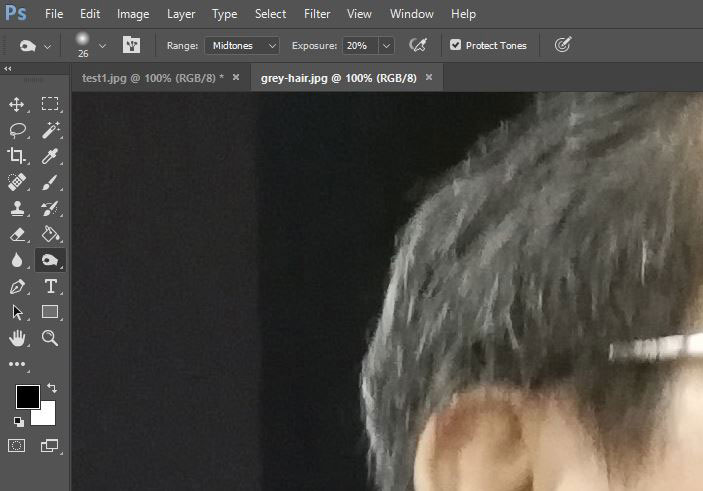
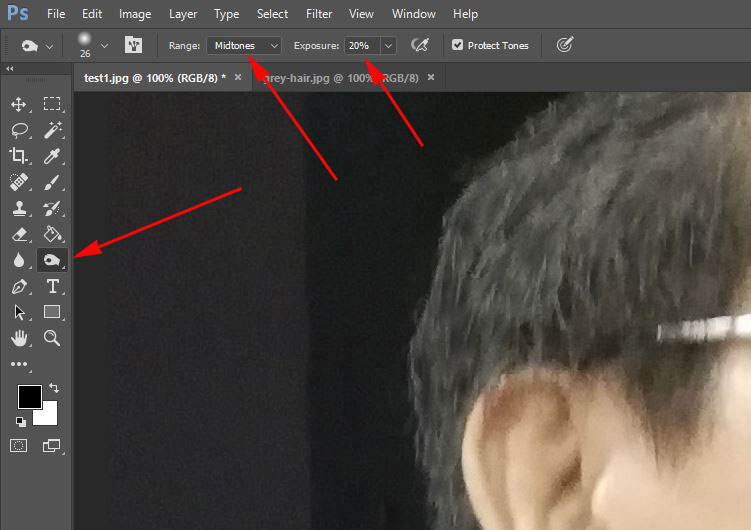
To darken grey hair, just use the Burn Tool and set the Range to Midtones and the exposure to 20%. Choose appropriate brush size and gently and carefully paint over the grey hair till you get the desired shade. Use Control-J to get a new layer to work on.
Before
After
How To Darken Grey Hair With Burn Tool
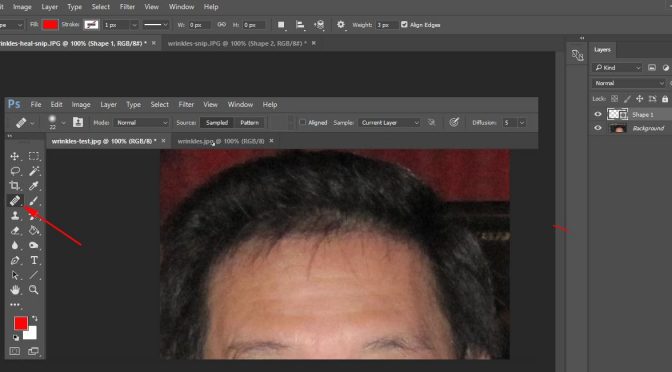
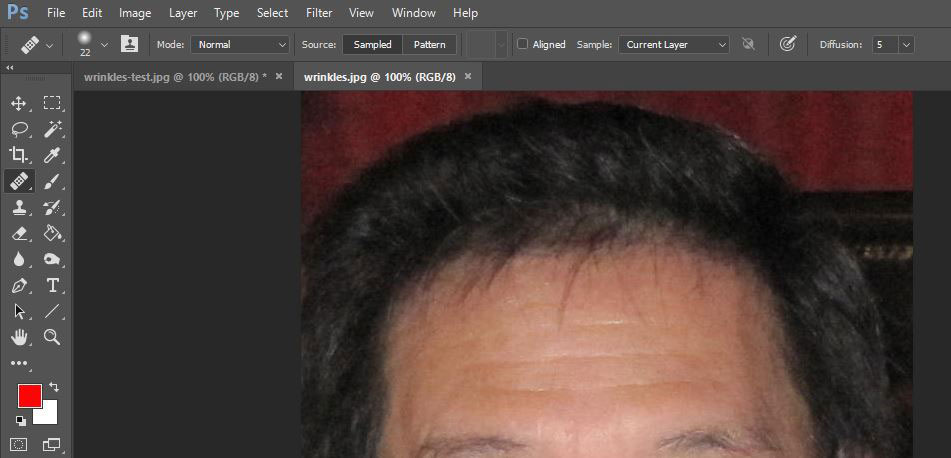
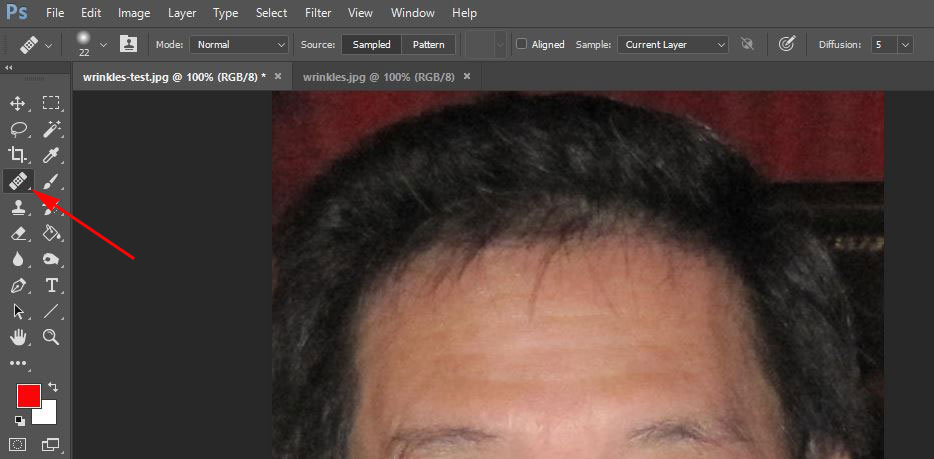
To remove wrinkles, use the Healing Brush tool. Choose appropriate brush size and not too much hardness (say 5-10%). Alternate-click on a clear adjacent part to use for covering the wrinkle. Use Control-J to get a new layer to work on.
Recently I was given a list of participants in a seminar and I was required to print out a certificate of attendance for each of them. The problem was the names were all in Uppercase. That would make the printout on the certificates look bad. I had to change them all to Propercase before merging with the Certificate template in Word for an automatic printout of the certificates. Luckily there is a simple formula to do that in Excel where I had copied the list of names.
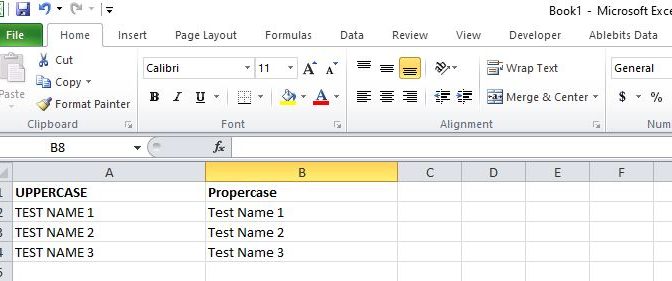
Consider that the names are in column A. Now we are going to convert the UPPERCASE names in column A to Propercase in Column B.
In cell B2, type =PROPER(A2), then press Enter. This formula converts the name in cell A2 from uppercase to propercase. To convert the text to lowercase, type =LOWER(A2) instead. Use =UPPER(A2) in cases where you need to convert text to uppercase, replacing A2 with the appropriate cell reference.
First, a suggestion: it may be better to just embed a video link to your video file hosted at a 3rd party site like YouTube as the video file will consume precious storage space on your website.
Nevertheless, there’s a case to be made for uploading a video file as an attachment to your article if it makes the article more compelling when the video is played in-situ.
Uploading and inserting the video into your article is straightforward enough. But there’s no dimension editing capability in the media library. To adjust the display size of the video, turn on the TXT or Source Code in the block and edit the dimensions within the code. It is not so straightforward but easy enough.
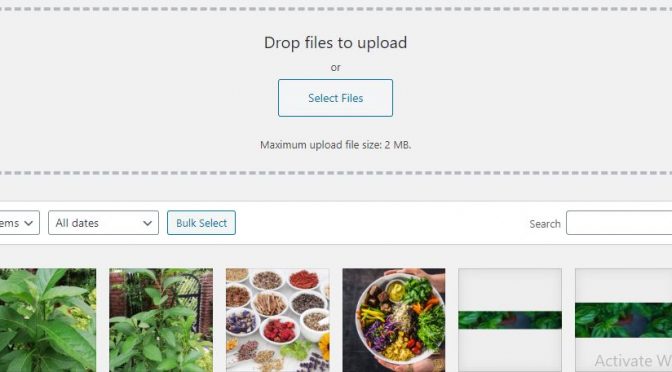
You know the awful feeling, when you are putting the final touches to your great article of the day, but the awesome image and/or video file just cannot upload due to the ridiculously low maximum file limit set in your media library.
The limit (something like 2MB) may be a default setting, which you can change yourself, or it could be a system limit set by your webhosting provider, in which case you need the webhosting provider to change for you.
If you Google for a solution, you will learn that there is no built-in ability to change within WordPress itself (why?). Invariably, the method calls for inserting some code into the .htaccess file or function.php file or php.ini file. If any of those does not work, then you need to contact your webhosting provider to do it for you.
If you intend to add code in any of the files mentioned above, you generally have to FTP download the file and edit it and then FTP upload it back. But here is a neat way to modify your php.ini file without the neccessity for FTP nor writing any code.
Go to your domain cPanel and look for MultiPHP INI Editor, in the Software section. Select your website from the dropdown menu and all the various parameters are there, including the Upload_Max_Filesize. By default, the maximum upload size in WordPress ranges from 2MB to 150MB depending on the settings of your web hosting provider is giving by default. I recommend you to put at 64MB. Here’s a peculiarity I discovered. My webhosting provider generously set for me 200MB but my WordPress websites all default to 2MB with that setting. I had to step it down to 64MB and it works. You may experience the same thing.
This is one of those simple problems in Life that should also be just as simple to solve….if only one knows how to open up the remote. If you send it to a Car Remote Vendor, it’ll cost you probably RM15-RM30 (USD3.50 – USD7.00). Here’s how to DIY for merely the cost of a replacement Li Ion battery that costs only RM1.90 (USD 0.45).
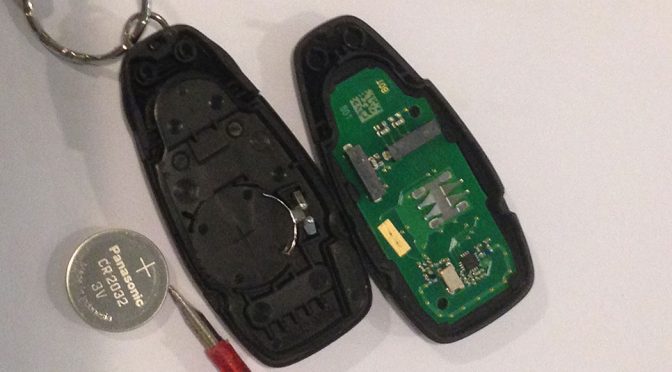
This is a typical car remote. Picture shows the remote from a Ford Fiesta.
There is a notch on either side of the remote.
Insert a screwdriver tip in the notch and gently pry open the remote.
You may need to gently pry/jiggle on both sides (both notches) to get the remote open. When the remote is open, you should be able to see the battery. Great! Use the screwdriver to gently ease the battery out.
Caution! Observe the polarity when you replace the battery.
Are you frustrated by these issues with WordPress and Softaculous?
The issues:
1. Plugin and Appearance have disappeared from the dashboard menu of your WordPress installation.
2. This particular WordPress installation is missing from the list of installations in Softaculous.
The problem is complex but the fix is simple; just follow the steps below.
Step 1
Get back the WordPress installation in the Softaculous list using the Import function in Softaculous WordPress dashboard.
Login to your cPanel and then in cPanel click the Softaculous link.
Step 2
In Softaculous, go to WordPress installations. Confirm your particular WordPress installation is not in the list.
Step 3
I assume you know where your paricular WordPress is installed on the server. If you don’t know, use the cPanel File Manager of a FTP client to determine where the WordPress is installed.
Step 4
In the Softaculous WordPress dashboard, click import and select your home directory and folder where your WordPress resides. Click import.
Step 5
Now your WordPress installation appears again in your list of WordPress installations. Select your installation and click clone to clone your WordPress installation to another folder.
Step 6
Go to your WordPress dashboard and you should see Plugin and Appearance have reappeared on the Menu. If not, use the cloned installation to troubleshoot.
One day you will sense that something does not seem to be going right with your notebook.
It could be any one of the following symptoms:
1. A sudden strange sound from your audio.
2. Your mouse becomes very unresponsive and may even freeze.
3. You cannot even shutdown and CTRL-ALT-DEL is not responsive.
All the above could indicate a progressively failing disk drive, starting with a bad sector.
Take urgent steps as follow:
1. Hold down the power switch to force shutdown.
2. Wait a while, then reboot.
3. Hopefully you are able to reboot into a working desktop. Scroll through the apps, go to Windows System, Command Prompt, right-click to Run as Administrator.
4. At the Command Prompt, type chkdsk /r
5. May have to shutdown, for the computer to execute on restart.
6. If the computer at some point, seems to hang or freeze at say 19% or something like that, give it time to complete. It may take a very very long time ( hours or overnight) but it should eventually overcome the bad sector that caused the problem.
Now the notebook will behave well, but quickly go change the hard disk and save the data while you can.


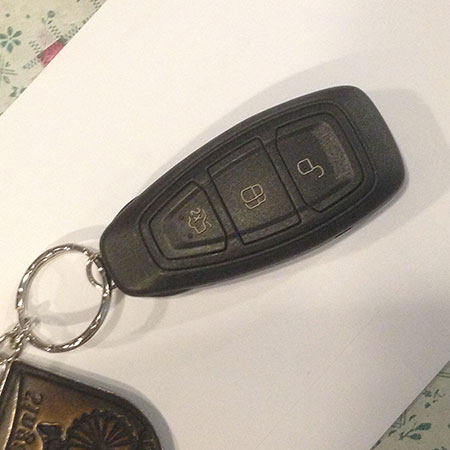 This is a typical car remote. Picture shows the remote from a Ford Fiesta.
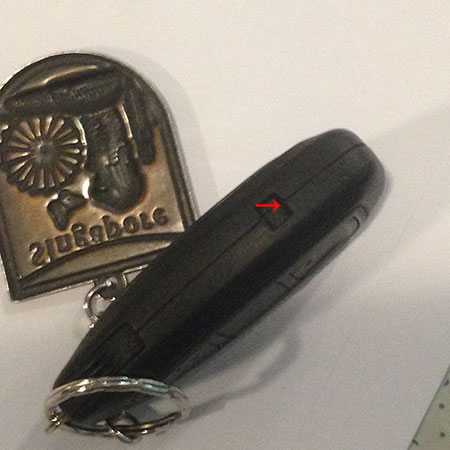 There is a notch on either side of the remote.
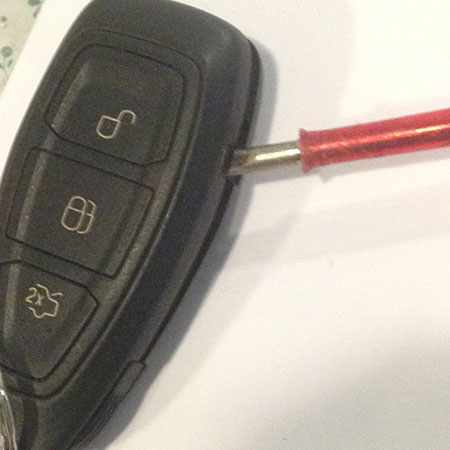 Insert a screwdriver tip in the notch and gently pry open the remote.
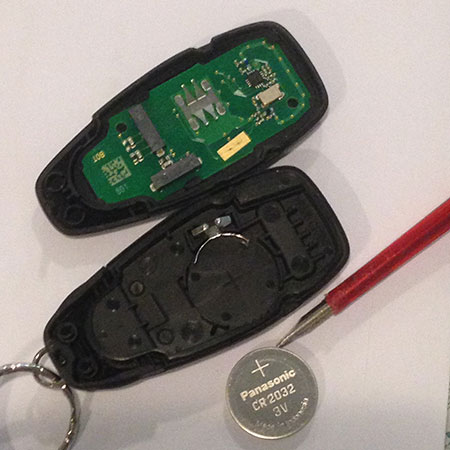 You may need to gently pry/jiggle on both sides (both notches) to get the remote open. When the remote is open, you should be able to see the battery. Great! Use the screwdriver to gently ease the battery out.