Category Archives: D-I-Y

New Life For A Windows XP, Vista Notebook PC

Support for Windows XP  ended on April 8, 2014 while support for Windows Vista ended on  April 11, 2017. So unless you wish to pay about RM130.00 for a new Windows 10 licence, your Notebook/PC is practically useless because many new programs will not run on XP/Vista and moreover your device is now a security risk.

That was the situation facing me with my wife’s HP Mini (Intel ATOM) notebook. It had Windows XP and was incredibly s-l-o-w. I was prepared to junk it when I decided to ask Uncle Google what can I do with it. Oh joy! I found this article https://www.computerworld.com/article/3033439/windows-xp-upgrade.html and it works! I will summarise it below:

The answer is in a service called CloudReady that converts old computers into  cloud-centric Chromebook-like systems. It’s provided free of charge to individual users by a company called Neverware. The CloudReady OS is based on Google’s Chromium OS, the same open-source architecture as Chromebooks and Chrome OS. Neverware has different pricing plans for Enterprises and Education Instituitions, but it available FREE for personal home use (with some limitations).

If you want to convert your old notebook/PC to a CloudReady Chromebook-like device that runs Google apps instead of Windows programs, here are the steps.

  1. Check that your old notebook/PC is compatible with CloudReady. https://guide.neverware.com/supported-devices/
  2. Check CloudReady’s critical requirements. https://guide.neverware.com/technical-details/#minimum-ram-requirements
  3. Make sure you have a good working Internet connection.
  4. Backup all your data from the target notebook/PC, as the installation will reformat your hard disk and wipe out everything.
  5. Download/create the installer on a USB stick, 8GB or more, using another PC (with Windows 7 or newer) with a Chrome browser. Be sure to use a blank USB stick as it will be reformatted to make the installer. https://usb-maker-downloads.neverware.com/stable/cloudready-free/cloudready-usb-maker.exe
  6. Use the Automatic USB Maker for simplicity.
  7. Make sure the target device is turned off. Plug in the USB Installer to boot from the USB stick. For my HP Mini, as I turned on the power, I clicked F9 repeatedly until I see the boot-up options on the screen. Select the boot from USB option. You should see a white splash screen with the CloudReady logo.

8. After the white splash screen with the CloudReady logo, you will see the Welcome Screen. Look for the digital clock on the lower right hand corner and click on it.
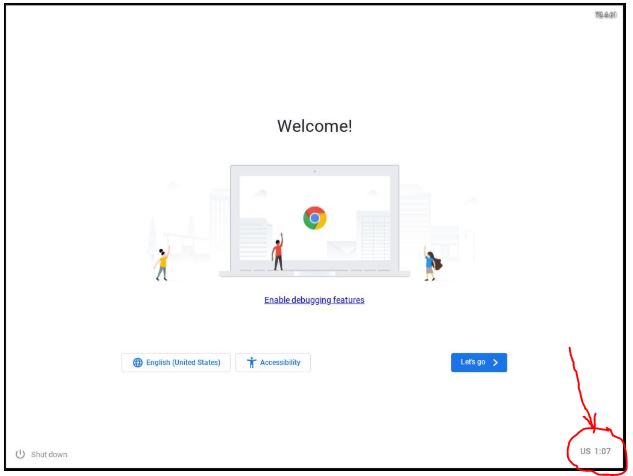
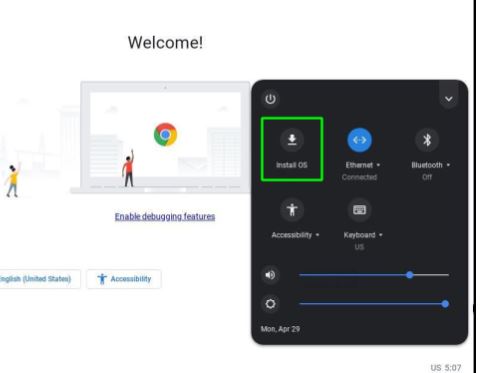
9. Be sure you have backed up your data. As the installation proceeds, the hard disk will be reformatted. Click the clock and then the Install OS option.
10. After the successful installation, you get a Welcome screen. Click on the Let’s Go…. Connect to your Network, Data Consent, and finally Sign-in with your Google account. That’s it…..
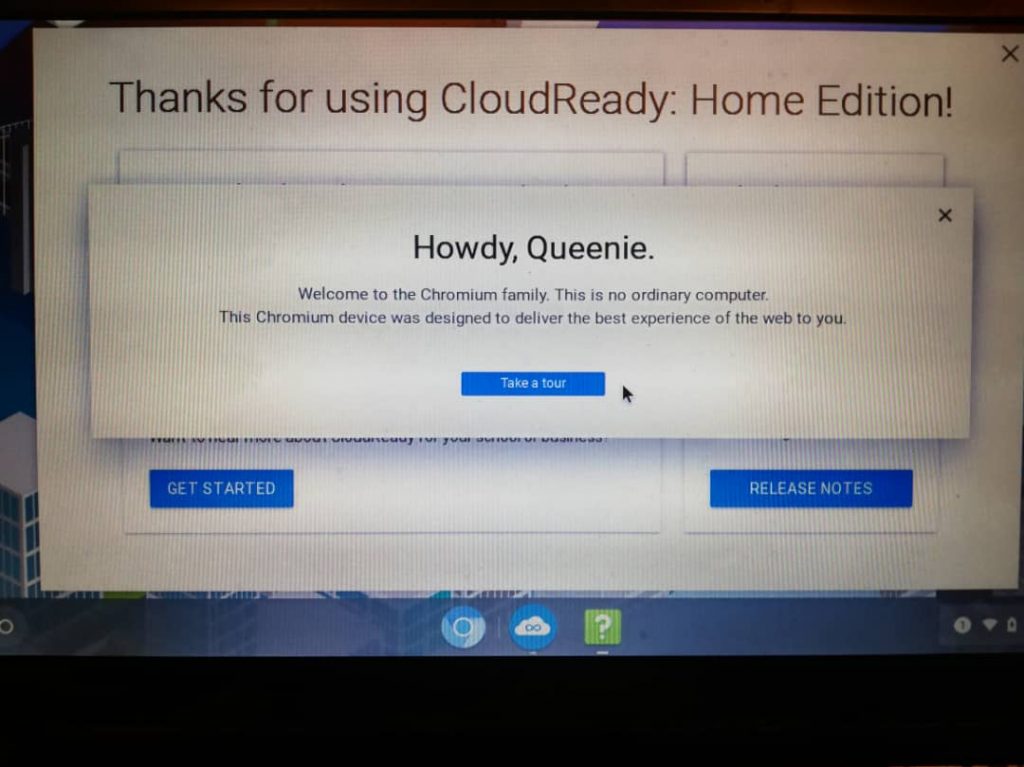
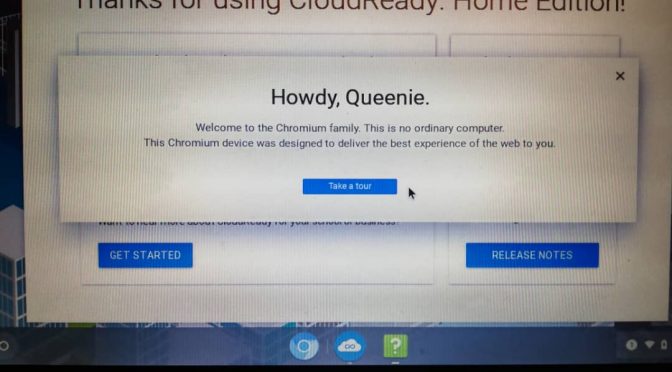
That’s it…your Windows XP computer is now an Android-like, Chromebook-like device. Use it for your Gmail and run Google apps. Enjoy!

How To Replace A Car Remote Battery

This is one of those simple problems in Life that should also be just as simple to solve….if only one knows how to open up the remote. If you send it to a Car Remote Vendor, it’ll cost you probably RM15-RM30 (USD3.50 – USD7.00). Here’s how to DIY for merely the cost of a replacement Li Ion battery that costs only RM1.90 (USD 0.45).

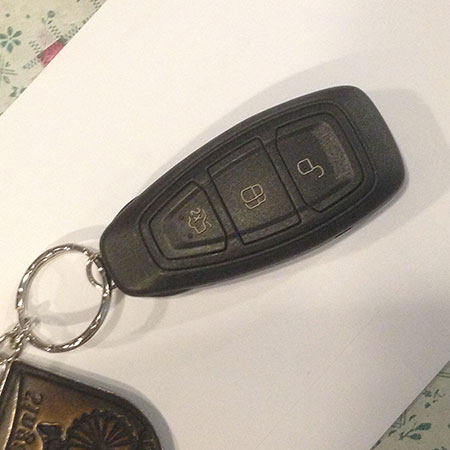
This is a typical car remote. Picture shows the remote from a Ford Fiesta.
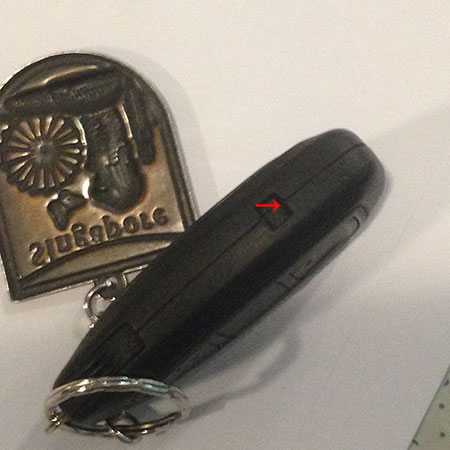


There is a notch on either side of the remote.
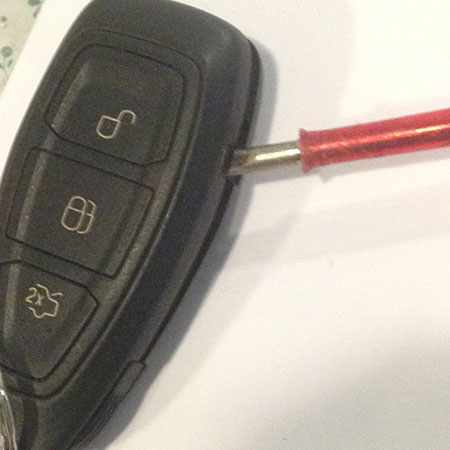


Insert a screwdriver tip in the notch and gently pry open the remote.
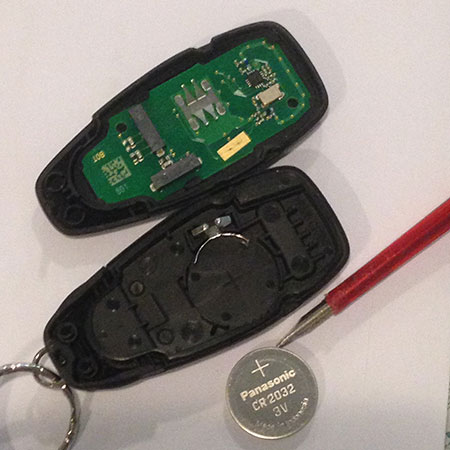


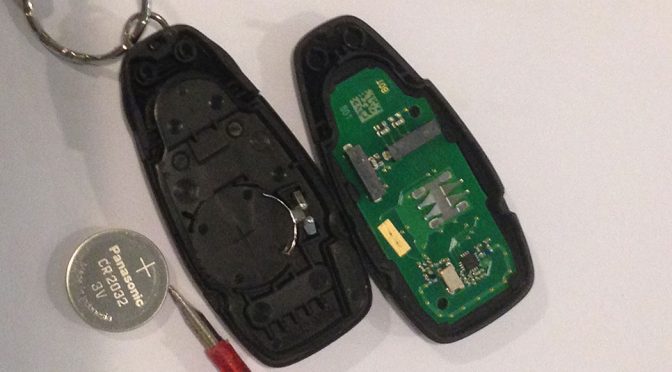
You may need to gently pry/jiggle on both sides (both notches) to get the remote open. When the remote is open, you should be able to see the battery. Great! Use the screwdriver to gently ease the battery out.
Caution! Observe the polarity when you replace the battery.

Rip, Compile and Burn Audio CD

Rip, Compile and Burn Audio CD

At some time, if you are a music buff, you may want to compile your own awesome playlist on an audio CD. And I don’t mean the MP3 compilations as you know MP3 is a lossy format. No sir, you want a compilation of the original lossless tracks, which means you have to rip or download or copy a track in either FLAC or WAV or WMA, which are lossless formats. Now, at this point if you start asking which of the three formats is the best to use, you’d be opening up an endless debate. But if you were to ask which one I use, I’d say all three but for the last-but-one stage I use WAV. Why WAV? And what about the final stage? Read on….

Disclaimer: What follows may not be the best or optimum way to rip, compile and burn an audio CD. However, it documents the methodology that I have finally settled on, after countless coasters made from useless CDs. Hopefully this will spare you the frustrations that I had endured up to now.

The free Tools I use:

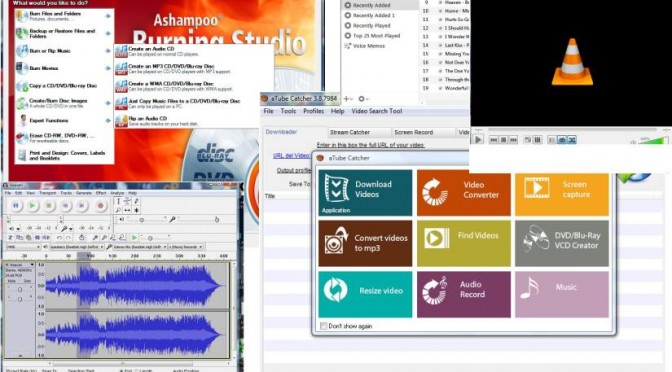
1. Ashampoo Burning Studio

2. VLC Media Player

3. aTube Catcher

4. Audacity

5. iTunes

6. Windows Vista Acer Notebook with CD/DVD player/burner

1. To rip an audio track from a music CD, I use Ashampoo Burning Studio and rip it in the lossless WAV format.

2. To get lossless FLAC high quality audio tracks from the Internet, use Bit Torrent to search and download.

3. Use aTube Catcher to record streaming MP3 tracks and convert to WAV (yes, I know…the MP3 tracks are already lossy…but if no choice, then MP3 will do. Convert to WAV just to keep all the files in same format).

A great website to download MP3 songs is http:/grooveshark.com/

4. Two ways to convert FLAC to WAV.
Use VLC Media Player to convert the downloaded FLAC files to WAV.
Media->Convert/Save->Add (the Flac, MPEG4 files)->Convert/Save as Audio-CD (WAV).

5. Or use Audacity to tidy up the files (cut off excessive silence front and back; and also to normalise the track to avoid clipping due to excessive amplitude). Open the FLAC files, edit and Export Audio as WAV.

6. Steps 4 and 5 convert the tracks to WAV as iTunes does not recognise FLAC. Transfer the final WAV tracks to iTunes’ Library as a Playlist.

7. Use iTunes (the icons at the lower left corner) to burn Playlist to CD as Audio CD.

8. Caution:

a. Check capacity of the blank CD and the total tracks size. iTunes does not check this and will give an error (the dreaded 4450 code) at the end!

b. Avoid the “Burn At Maximum Speed Possible”…..again iTunes only gives the error at the end, if your CD brand cannot handle the high speed. After iTunes has made me a bundle of coasters, I wised up and throttled the burn speed down to 8X, which worked for me.

c. If you want the track names to be displayed by your CD Player (if it has this feature), then be sure to check “Include CD Text” before burning.

Footnote:

Why not just use Ashampoo Burning Studio to rip tracks from CDs to WAV or WMA format and burn the compilation as WMA (or WAV)? Unfortunately not all CD player plays WAV/WMA formats. That’s why I use iTunes to burn an Audio CD for full compatibility in all CD players.

If your CD Player supports FLAC, WAV or WMA, and you don’t intend to play your CD anywhere else nor share with anybody else, then just use a Burn Software (eg. Ashampoo Burning Studio, Nero, etc..) to rip the tracks into WAV or WMA format and burn the CD with either one of the formats to cut down the complexity of all the foregoing convoluted steps.

How To Fix A Plastic Bolt Without A Washer

While this Tip shows a quick-fix to a problem with securing a toilet seat, the same method can be applied to similar problems with other plastic situations.

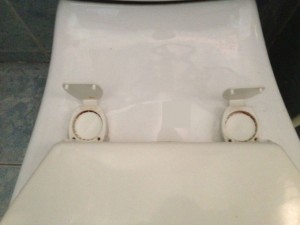
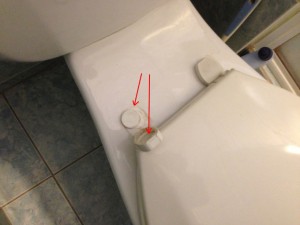
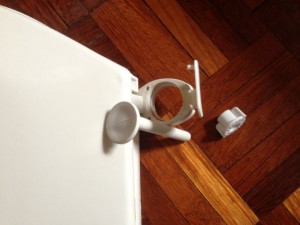
seatA toilet seat, usually with a hinged cover, is bolted to the toilet bowl for a flush system. The bolt is usually made of plastic with one end flared to secure the seat to the bowl. The problem is, very often the flared end of the plastic bolt slips right through the hole of the hinge’s base. You can get a metal washer but it would rust in no time. Anything else (stainless steel washer, plastic washer, etc) would be too much of an effort to find/buy, if at all available.


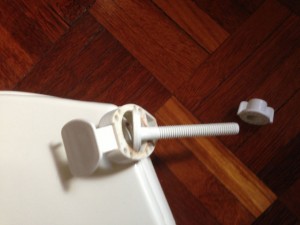
seat-3A view of the component parts. The seat, the hinge, the plastic bolt and nut.


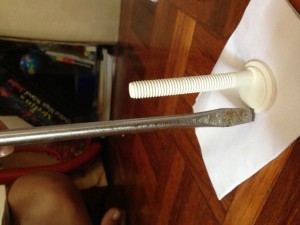
seat-5aSee the bolt inserted in the hinge but is able to slip out of the hole.


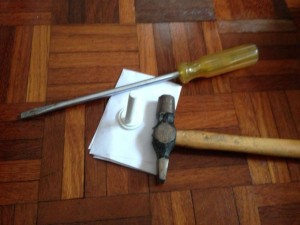
seat-6aAll that’s required. A chisel-like tool ( a large screwdriver will do fine ) and a hammer ( or a rubber mallet, if you are a stickler about using the right tool ).


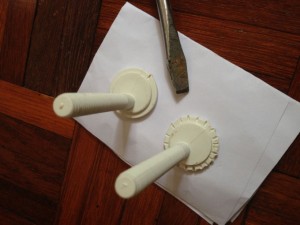
seat-7Use the screwdriver+hammer to make indentations in the plastic bolt’s flared end.


seat-8Compare the two bolts: one has the indentations completed.


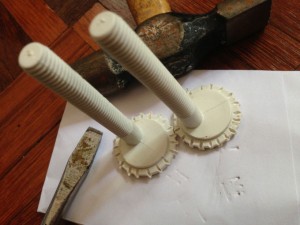
seat-9Both completed. Just a minor tip here: in a paired situation ( two bolts, two lamps, two batteries…etc.) always repair both/change both together. If one has failed, most likely the other will fail soon too.


seat-10The bolts now stay well in place in the hinge. Re-bolt the seat to the toilet bowl and we’re done..

“Old” HP Photosmart 7260

Elsewhere you may have read that I bought a Canon printer after years of using HP printers.

Well, I found some un-used ink cartridges for my old HP Photosmart 7620, so I dusted the printer off and used it to print hardcopies of manuals and eGuides to finish off the ink.

This was fine for a few days (even though the paper-loading was a pain) and managed to print some decent copies of useful eGuides. Then the printer ran into a snag. No matter how I tried, the fault light would not go off. I deleted the driver and mounted the CD (yes, I sill have it) to re-install. What do you know? The CD gave an error message that my OS is not recognised (Vista). It’s supposed to be for up to XP only, that’s how old the printer is. OK, go to HP website to download the driver, and happily the support message says that the driver for Photosmart 7200 series is built-in the Vista OS. Connected the printer to my USB again, and indeed, Windows Vista recognises the printer and installed the driver. I must have done this before years ago, otherwise how did the printer work with my Vista PC in the first place? 

However, it still will not work.  On a hunch, I changed the black ink cartridge….and it worked! I guess it’s my fault for not knowing that the red alert light indicates empty ink cartridge. 

Oh well, I’ll mothball the printer again when the ink is finished.